Category: Production Tools & Gear

Camera comparisons, video editors, DAWs, color grading, and hardware/software reviews.

  • The 10 Best Episodic Content Tools for Creators in 2026

    The 10 Best Episodic Content Tools for Creators in 2026

    This round-up caught my attention because episodic content stopped being a niche strategy years ago — it’s now the easiest way to keep audiences coming back and please recommendation algorithms. I follow creators who went from random posts to multi-episode franchises, and the tool choices they make determine whether a series feels polished or falls apart in episode three. So I pulled together the tools creators are actually using in 2025 and tested the headlines: which features are meaningful, which are marketing, and what you should pick based on team, budget and platform.

    The 10 Best Episodic Content Tools for Creators in 2025 — what to actually use

    What Makes Episodic Content Different from One-Offs?

    Before the tools, it is worth spelling out why episodic production needs a different toolkit from standalone videos. Three things change when you commit to a series.

    First, arc tracking. A series has narrative threads that span multiple episodes — character arcs, recurring segments, callback references. Without a system to log these, continuity slips through the cracks by episode four. Spreadsheets can do it, but purpose-built tools surface conflicts and gaps faster.

    Second, visual and audio consistency. Audiences notice when your color grade drifts or your lower-thirds use a different font between episodes. Maintaining a consistent look across weeks of production requires templates, presets and sync tools that one-off projects never need.

    Third, batch workflows and scheduling. Episodic creators shoot, edit and publish on a repeating cadence. That means recurring shoot schedules, batch exports, repeatable project structures, and a content calendar that accounts for dependencies between episodes. Tools built for series reduce that friction to near zero.

    These three factors — arc tracking, consistency, batch workflows — are the lens I used to evaluate the tools below.

    Below: a numbered Top 10 with one-line summaries. Read on for feature calls, pricing tiers, a simple decision matrix, and recommended combos by creator profile.

    1. Final Draft — Industry screenwriting with episodic trackers and AI-assisted scene suggestions for long-form arc management. Its strength is structured, dialogue-heavy series where character continuity matters across episodes. The limitation: expensive for what is essentially a writing tool, and collaboration features lag behind cloud-native alternatives. Best for scripted content that tracks recurring characters and plot threads across a full season. (Pricing tier: $$; Platforms: macOS, Windows, iOS, Web)
    2. Celtx Studio — All-in-one pre-production + season planning with built-in episodic trackers and production exports. Celtx covers writing, scheduling and budgeting in one interface — useful for small teams avoiding five separate apps. The tradeoff is depth: its script editor is competent but less refined than Final Draft, and its scheduling module is lighter than StudioBinder’s. Where it shines is the season-level planner that tags scenes across episodes and exports beat sheets directly into production. (Pricing tier: $–$$; Platforms: Web, macOS, Windows, iOS, Android)
    3. StudioBinder — Production management that handles episode-level shooting schedules, call sheets and two-way calendar sync. The operational backbone for teams shooting on location across multiple episodes. Its free tier is surprisingly capable for a single production, but episodic features — recurring cast availability and cross-episode location scheduling — require paid plans. One limitation: web-first, so offline access is limited during field shoots. (Pricing tier: $–$$$; Platforms: Web, iOS)
    4. Storyboard That — Fast visual storyboarding for episode blocking and shot-lists; useful for remote teams and quick iterations. (Pricing tier: $; Platforms: Web)
    5. Adobe Premiere Pro — Editing with batch clip-trim tools and episode-sync presets for consistent cuts across episodes. (Pricing tier: $$; Platforms: macOS, Windows)
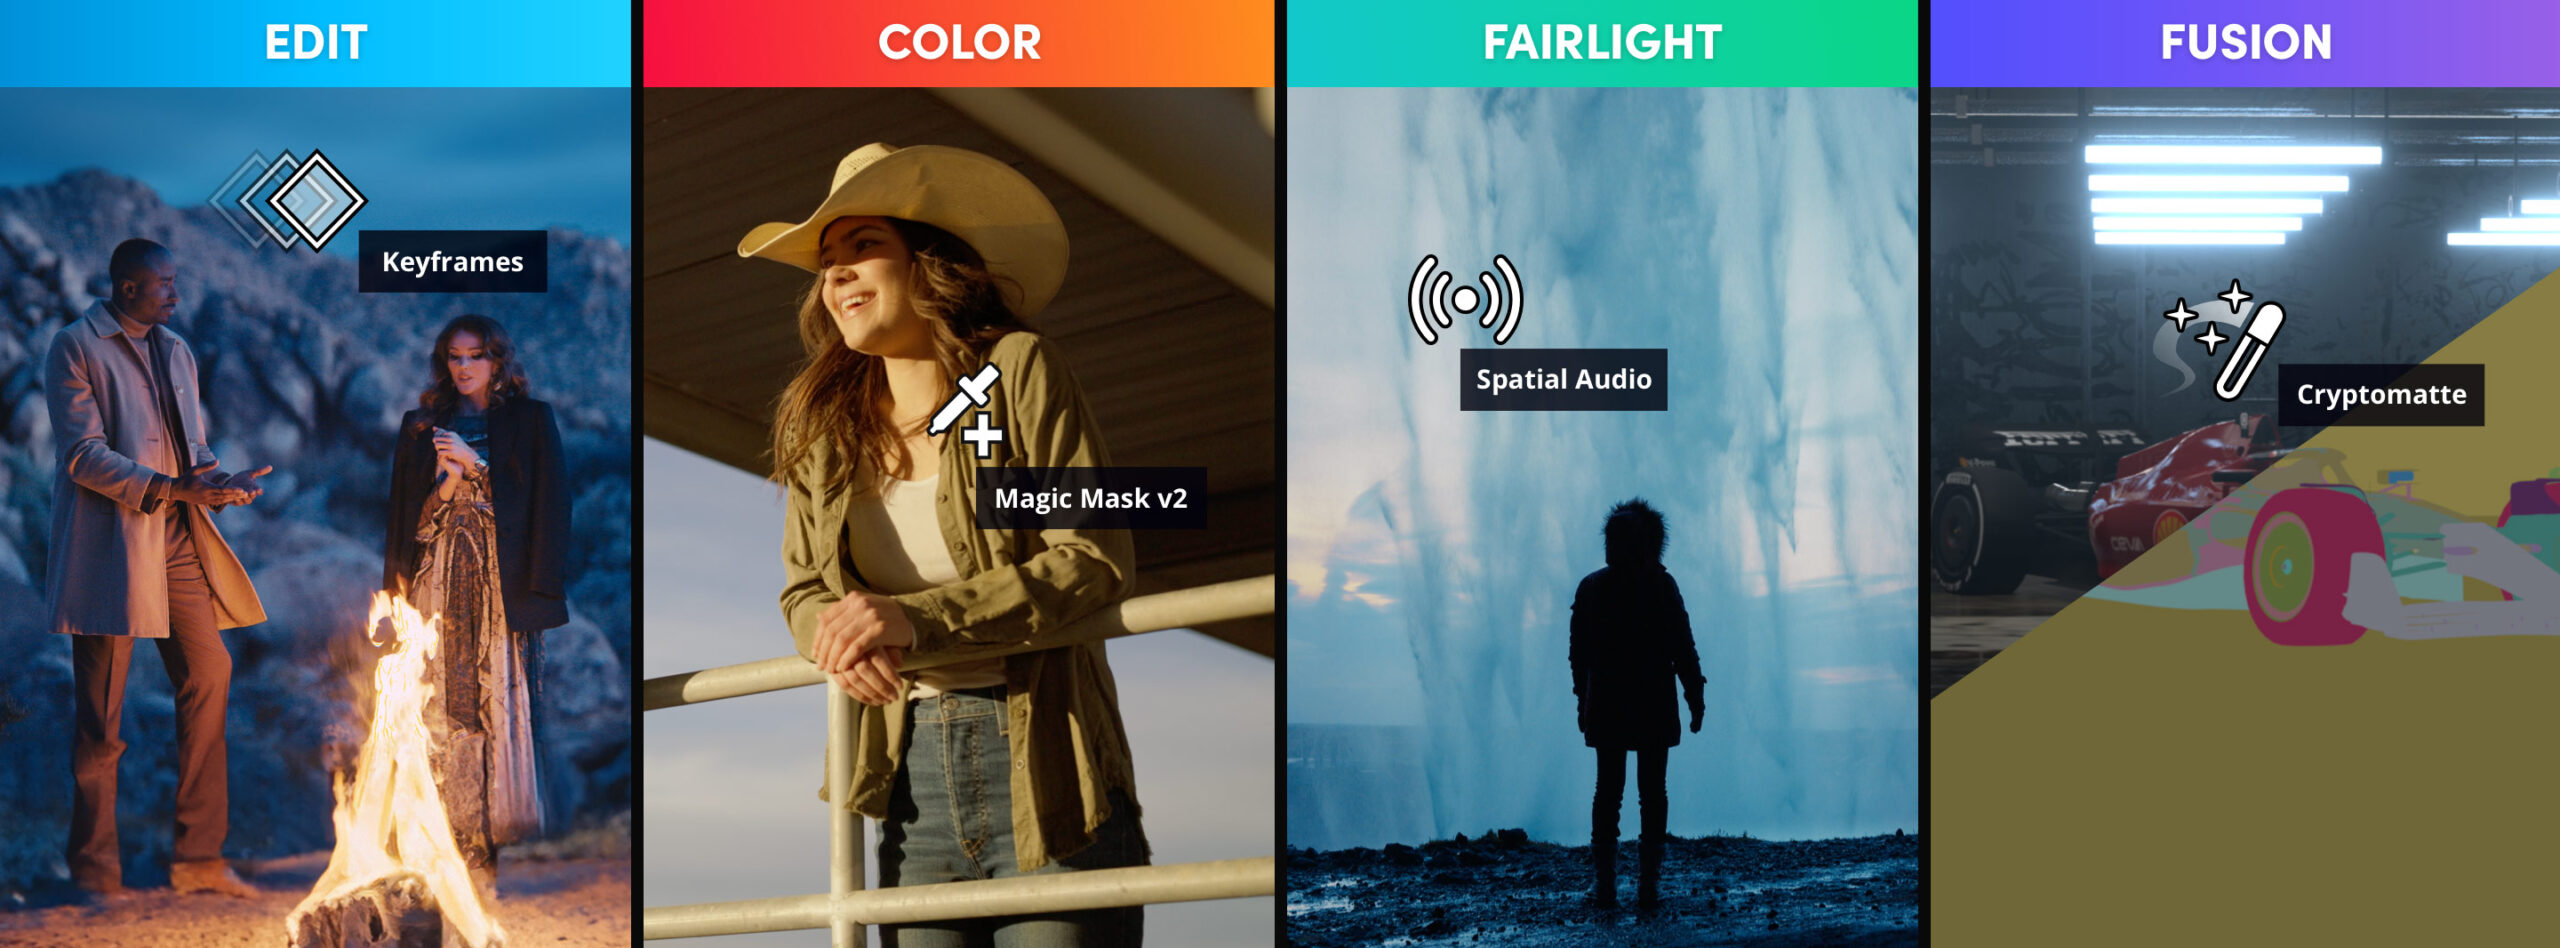
    6. DaVinci Resolve — Color, finishing and “Episode Sync” workflows that copy grades, LUTs and timeline settings across episode timelines. The free version is the most capable no-cost editor for series work — multi-timeline projects, Fairlight audio, and solid color grading at zero cost. The Studio upgrade unlocks GPU noise reduction, HDR grading and collaborative workflows for larger teams. Steeper learning curve than Premiere, but the payoff for episodic consistency is significant. (Pricing tier: Free–$$$; Platforms: macOS, Windows, Linux)
    7. After Effects — Motion templates and episode templates to keep title and lower-third design consistent across a series. (Pricing tier: $$; Platforms: macOS, Windows)
    8. Descript — Transcripts, multitrack rough-cuts and Overdub that speed up episodic editing and repurposing. Descript is the fastest path from footage to rough assembly for talk-based series — podcasts, interviews, commentary. Edit the transcript and the video follows. For episodic work, saving speaker profiles and templates across projects means episode two takes half the setup time of episode one. The limitation: Descript is optimized for dialogue, not visual storytelling. B-roll heavy series with minimal narration will hit its ceiling fast. (Pricing tier: Free–$; Platforms: Web, macOS, Windows, iOS)
    9. CapCut — Mobile-first repurposing and batch export to vertical formats with basic scene-aware trims for social episodes. (Pricing tier: Free–$; Platforms: iOS, Android, Web)
    10. Canva — Social templates, bulk-resize and scheduler that turn episodes into platform-ready assets fast. (Pricing tier: Free–$; Platforms: Web, macOS, Windows, iOS, Android)

    Why these 10 matter — and what to watch for

    You’ll see a pattern: pre-production tools focus on season arcs and episode trackers (Final Draft, Celtx), production managers keep logistics tight (StudioBinder), post tools solve consistency at scale (Premiere, DaVinci, After Effects), and social tools close the loop (Descript, CapCut, Canva). The tradeoff is always best-of-breed vs. consolidated suites. For solo creators, integrated suites reduce friction; for larger teams, advanced post features and robust integrations win productivity back.
    Concrete episodic features and examples

    • Episode / Arc trackers: Final Draft (2024/13 update) added scene-assist features that suggest alternate beats for recurring characters — useful for mapping arcs across episodes. Celtx’s season planner lets you tag scenes and export episode-level beat sheets to production.
    • Episode Sync (post): DaVinci Resolve supports copying color grades, LUTs and timeline presets across multiple episode timelines so every ep keeps the same look without repeating tweaks. Premiere’s project templates and batch export features speed up iterative cuts.
    • Two-way integrations: StudioBinder and Final Draft integrations reduce manual exports: scripts -> shooting schedule -> call sheets can now flow without rekeying, saving hours per episode on average in small productions.
    • AI that helps, not replaces: Descript transcribes and marks speaker changes to speed up rough cuts; Premiere/DaVinci’s AI trims and scene-detection speed repetitive tasks. These are pattern-match assistants — still require human oversight for tone and story.

    Free vs Paid: Where to Draw the Line

    Most tools on this list offer a free tier or trial. When do you actually need to pay? After testing free versions against episodic workflows, the answer comes down to two factors: episode volume and team size.

    For a solo creator producing fewer than four episodes per month, free tiers cover surprising ground. DaVinci Resolve free handles editing, color and audio. Canva free provides enough templates for thumbnails and social assets. CapCut is free for most features. You can run a lean episodic workflow without spending a dollar.

    The cracks appear when volume or collaboration increases. Free tools cap storage, export quality, or team seats. Descript’s free transcription hours run out fast if episodes exceed twenty minutes. Canva free lacks Brand Kit, meaning you manually match colors and fonts each episode instead of locking them once. StudioBinder’s free plan supports a single project — fine for one series, limiting if you run multiple shows.

    The paid features that deliver the clearest ROI for episodic creators are: batch export (saves hours per episode), brand/template locking (prevents visual drift), and multi-user permissions (avoids version conflicts). If your series hits five or more episodes and involves anyone besides you, paid tiers typically pay for themselves within the first month.

    Pricing & platform cheat-sheet

    Below I use price buckets rather than exact dollar figures to keep this useful across frequent vendor changes: Free, $ (≤ $15/mo per seat), $$ ($15–$50/mo), $$$ ($50+/mo or enterprise). Platform column lists where the apps run natively or in-browser.

    Tool Pricing Tier Platforms Standout Episodic Feature
    Final Draft $$ macOS, Windows, iOS, Web Scene/arc tracking + AI scene suggestions
    Celtx Studio $–$$ Web, macOS, Windows, iOS, Android Season planner + script → production export
    StudioBinder $–$$$ Web, iOS Episode-level scheduling & two-way calendar sync
    Storyboard That $ Web Fast visual storyboards and shot lists
    Adobe Premiere Pro $$ macOS, Windows Batch trims, project presets & episode templates
    DaVinci Resolve Free–$$$ macOS, Windows, Linux Episode Sync: copy grades/LUTs across timelines
    After Effects $$ macOS, Windows Motion/episode templates for consistent graphics
    Descript Free–$ Web, macOS, Windows, iOS Transcripts, Overdub, multitrack rough-cuts
    CapCut Free–$ iOS, Android, Web Batch export & vertical-first repurposing
    Canva Free–$ Web, macOS, Windows, iOS, Android Bulk-resize templates + scheduler

    Quick decision matrix: which tool if you…

    Profile Budget Quick pick
    Solo creator / vlogger Low Descript + CapCut + Canva (integrated, low-cost)
    Duo / small team Moderate Celtx + Premiere + Descript
    Mid-size indie show Moderate–High Final Draft + StudioBinder + DaVinci Resolve
    Studio / high-output High Final Draft + StudioBinder + Premiere/After Effects + centralized asset storage

    Recommended combos by creator profile

    • Solo / Duo (fast turnaround): Descript (scripted repurpose + rough-cuts) → CapCut (vertical exports) → Canva (thumbnails & posts).
    • Small team (season planning): Celtx (season tracker) → Premiere Pro (editing) → Descript (transcripts & cutdowns).
    • Indie series / mid-size (polish): Final Draft (arc tracking) → StudioBinder (scheduling) → DaVinci Resolve (color & Episode Sync) → After Effects (motion templates).
    • High-output studio: Final Draft + StudioBinder with asset management (cloud) + Premiere/After Effects + dedicated social repurpose pipeline (Descript, CapCut, Canva).

    Workflow Example: Planning a 6-Episode YouTube Series

    Here is a concrete walkthrough of how the recommended solo creator stack — Descript, CapCut and Canva — handles a six-episode YouTube series from planning through publication.

    Week 1: Planning and scripting. Outline all six episodes in a single document — a Google Doc or Notion page works fine. Define the through-line: what connects episode one to six, what recurring segments exist, and what the visual identity looks like (intro style, color palette, thumbnail template). Lock these decisions before recording. Changing your intro format at episode four looks sloppy and costs time.

    Week 2-3: Recording and rough assembly. Record in batches — two or three episodes per session. Import footage into Descript, which transcribes automatically. Edit by reading the transcript: cut filler, rearrange sections, mark highlights for social clips. Save speaker labels and your project template after episode one so subsequent episodes inherit the same structure. By episode three, per-episode editing time drops roughly 30-40% because the tool already knows your speakers and settings.

    Week 3-4: Social repurposing and packaging. Export final cuts from Descript, bring highlight clips into CapCut for vertical reformatting — batch export handles aspect ratio conversion and auto-captioning for Shorts, Reels and TikTok. In Canva, build your thumbnail template: same layout, font, color scheme, with a swappable image and episode number. Duplicate five times, swap visuals, six consistent thumbnails in under twenty minutes. Use Canva’s scheduler to queue social posts alongside each publish date.

    The result: Six episodes, visually consistent, social assets ready, using three tools costing between zero and fifteen dollars per month combined. No production management software needed at this scale.

    Buyer’s checklist — test these before you commit to an annual plan

    1. Integration test: can script/beat sheets flow into production schedules without manual copy/paste?
    2. Export formats: does the tool export to the formats your post team needs (AAF, XML, PDF, SRT)?
    3. Team permissions & version control: does it support per-episode versions and rollback?
    4. Storage & transfer: are assets centralized or do you need a separate DAM/CDN?
    5. AI transparency: can you see and edit AI suggestions (transcripts, scene suggestions, trims) before committing?
    6. Trial + templates: is there a free trial and episode templates to test at least two episodes end-to-end?
    7. Cost per seat vs. per-project: calculate real cost for your season (seats × months + storage + exports).

    How I tested these

    I built small pilot workflows for solo, duo and mid-size teams: wrote sample episode outlines, exported to production, ran a single shoot day schedule and pushed footage through edit, grading and social repurposing. I judged each tool on: episode consistency (did titles, lower-thirds, color match?), integration friction (how many manual exports?), and AI usefulness (time saved vs. required fixes).
    Frequently Asked Questions

    Can I use free tools for episodic content?
    Yes, up to a point. DaVinci Resolve free, CapCut and Canva free handle a solo series of four to six episodes per month without major friction. You will hit limits on transcription hours (Descript), brand kit features (Canva) and collaborative editing once you scale beyond that or add team members. Start free, upgrade only when a specific bottleneck forces the switch.

    What is the minimum tool stack for a series?
    At minimum, an editor and a template tool. Descript or DaVinci Resolve for editing, plus Canva for thumbnails and social assets, covers the essentials. Add a project management tool (even a free Notion board) once you pass three episodes or add a collaborator. Everything else is optimization.

    How do I keep visual consistency across episodes?
    Lock decisions early: color grade, fonts, intro/outro templates, thumbnail layout, lower-third style. Build these as presets in your tools before episode one. In DaVinci Resolve, save a PowerGrade and apply it across timelines. In Canva, create a Brand Kit (Pro) or a locked template (free). In Descript, save your project as a template with speaker labels and export settings. The principle: define the look once, replicate mechanically, resist the urge to “improve” mid-season.

    Final thoughts / TL;DR

    Pick for workflow fit, not hype. If you’re solo, favor integrated, low-cost stacks (Descript + CapCut + Canva). If you manage seasons and teams, invest in Final Draft or Celtx for arc tracking, StudioBinder for production, and Premiere/DaVinci for consistent post. Use AI to speed grunt work — not to write your beats. And before you subscribe, test two episodes end-to-end to reveal the hidden admin costs of stitching apps together.

    {{INFO_TABLE_START}}
    Publisher|Base.tube
    Release Date|2025-12-03
    Category|Episodic & Long-form Content tools
    Platform|Multi-platform (Web, macOS, Windows, iOS, Android)
    {{INFO_TABLE_END}}
  • DAWs for Creators in 2026 — Ableton, Logic, Pro Tools and What Actually Matters

    DAWs for Creators in 2026 — Ableton, Logic, Pro Tools and What Actually Matters

    This caught my attention because the last few years have split DAWs into two camps: tools that genuinely speed up a creator’s output, and tools that mostly sell shiny plugin bundles. As someone who edits livestreams, scores short films, and produces quick turnaround tracks, I wanted a no-nonsense run-down of which DAWs actually help creators ship better audio – fast.

    The Best Digital Audio Workstations for Content Creators in 2025 – practical picks, not hype

    • Key takeaway: Choose a DAW for workflow, not fanboy status – Session view (Ableton) vs. linear composition (Logic/Cubase) matters.
    • Key takeaway: Watch platform lock-in and pricing: Logic’s one‑time buy vs. Pro Tools’ subscription vs. expensive “all plugins” bundles.
    • Key takeaway: If you stream live or need fast turnaround, prioritize DAWs with good loop/pattern tools and low-latency monitoring (Ableton, FL, Bitwig).
    • Key takeaway: For film/game audio and immersive formats, Pro Tools and Cubase still lead for industry standards like Dolby Atmos and advanced MIDI/orchestration.

    {{INFO_TABLE_START}}
    Publisher|Base.tube
    Release Date|2025-12-03
    Category|Music and creative tools for creators
    Platform|Multiple (Windows, macOS, Linux — varies by DAW)
    {{INFO_TABLE_END}}

    What Creators Actually Need from a DAW

    Before diving into specific picks, let’s cut through the marketing noise. Most DAW comparison articles are written for producers making albums. Creators have different priorities. You need fast export — bouncing a 30-second intro sting shouldn’t take five clicks through nested menus. You need low-latency monitoring so your voice or instrument doesn’t lag behind your stream. You need decent loop and sample libraries out of the box, because hunting for royalty-free sounds at 2 AM before a deadline is not a workflow — it’s a cry for help.

    Two features that most guides ignore: video sync and stem export for social. If you score your own YouTube videos, you need a DAW that lets you import a video reference and lock your audio to specific timestamps. Logic, Cubase, and Pro Tools handle this well. FL Studio and Ableton can do it, but it’s clunkier. And stem export — splitting your track into vocals, drums, melody, and effects — is becoming essential for repurposing content across TikTok, Reels, and Shorts where you might want just the beat or just the vocal hook. Studio One and Ableton handle stem workflows more gracefully than most.

    Bottom line: if a DAW slows you down between idea and published content, it doesn’t matter how many Grammy winners use it. Pick for speed and output, not prestige.

    The short version: who shines and why

    Ableton Live

    Ableton Live — still the live/loop king. If you stream live sets, make beats on the fly, or build tracks during a stream, Ableton’s Session View remains peerless. Its clip-based workflow reduces context switching, which matters when you’re juggling chat, scenes, and audio. The dual-view system — Session for jamming, Arrangement for finishing — means you can improvise during a livestream and then polish the recording into a finished track without switching tools. Ableton’s built-in effects are genuinely usable, particularly the Glue Compressor and Corpus for quick sound design. The biggest limitation is price: the full Suite edition runs $749, and the entry-level Intro ($99) strips out too many features for serious work. Standard at $449 is the sweet spot for most creators. Workflow tip: set up a default template with your streaming audio inputs pre-routed — it’ll save you ten minutes every session.

    Logic Pro

    Logic Pro — best value for Mac users. One-off price, huge sound library, and composition tools that make scoring quick. But it’s Apple‑only; buying into Logic is effectively buying into macOS for audio work. At $199.99 as a one-time purchase, Logic is absurdly good value. You get a 72 GB sound library, Drummer tracks that generate realistic drum parts on the fly, and a surprisingly capable AI-assisted mastering tool in the Mastering Assistant. For YouTube creators who score their own content, the video import and scoring workflow is smooth — better than most competitors at this price point. The limitation: no Windows or Linux version, ever. If there’s any chance you’ll switch platforms in the next five years, factor that into your decision. Workflow tip: use Smart Tempo to match imported audio clips to your project BPM automatically — a massive time-saver when working with samples from different sources.

    Cubase

    Cubase — MIDI nerds and orchestrators: Cubase still offers the deepest MIDI editing and expression tools. If you’re writing complex arrangements or scoring, its toolset saves hours compared with more performance-oriented DAWs. The Key Editor and Score Editor are leagues ahead of anything else for detailed MIDI work, and the Expression Maps system lets you control orchestral libraries with precision that other DAWs can only approximate with workarounds. Cubase Pro ($579) is the full package; Elements ($99) is surprisingly capable for creators who mainly need recording and basic MIDI. The learning curve is real — Cubase’s interface can feel dense until you customize it. But once you build your workflow, it’s one of the fastest DAWs for complex production. Ideal for creators who produce cinematic content, game audio, or orchestral YouTube covers. Workflow tip: create macro commands for your most common editing sequences — Cubase’s macro system is one of the most powerful and underused features in any DAW.

    Pro Tools

    Pro Tools — studio standard for a reason. If you’re collaborating with professional studios, delivering broadcast-ready mixes, or mixing for immersive formats (Dolby Atmos/Spatial Audio), Pro Tools is often required. The tradeoff: subscription models and a steeper learning curve for solo creators. Pro Tools now runs $9.99/month for the Artist tier (formerly “First” — limited to 32 audio tracks) or $39.99/month for the full Studio version with Dolby Atmos support. The subscription model is polarizing, but it does mean lower upfront cost if you’re testing the waters. Pro Tools’ editing precision is still unmatched for dialogue, podcast post-production, and film scoring. If you’re delivering audio to clients who work in studios, sending them a Pro Tools session file eliminates compatibility headaches. Biggest limitation for creators: it’s not built for beat-making or live performance. Workflow tip: learn the keyboard shortcuts for Clip Gain and Fades — these two features alone make podcast editing twice as fast.

    FL Studio

    FL Studio — the fastest beat-to-track pipeline. Pattern-based sequencing and rapid sound design keep it a favorite for beatmakers and creators who need to pump out tracks quickly. It’s also beginner-friendly but scales surprisingly well. The lifetime free updates policy is unique and genuinely consumer-friendly — buy once, get every future version. Fruity Edition starts at $99, Producer at $199, and the All Plugins Bundle at $499. For most creators, Producer is enough. FL’s Channel Rack and Piano Roll are among the most intuitive in any DAW for writing melodies and programming drums. The limitation: audio recording and mixing workflows feel bolted-on compared to the beat-making side. It’s gotten much better in recent versions, but if your primary need is recording vocals or live instruments, other DAWs handle it more naturally. Ideal for YouTube beat-makers, lo-fi producers, and creators who release music as content. Workflow tip: use the Pattern system to build modular song sections — you can rearrange entire songs by dragging patterns in the Playlist, which is faster than copying and pasting regions.

    Studio One

    Studio One — an efficient all-rounder. Modern UI and solid integration with PreSonus hardware. The Professional edition’s Melodyne integration is a real time-saver for vocal work without buying extra plugins. Studio One Professional runs $399 one-time, and the built-in Melodyne (ARA integration) means pitch correction without leaving the DAW. The drag-and-drop workflow is genuinely faster than most competitors for arranging and sound design. It also has a dedicated mastering suite built in — no need for a separate mastering session. Artist edition at $99 covers basics but lacks third-party plugin support, which is a dealbreaker for many. Ideal for creators who need a balanced tool for recording, mixing, and mastering without juggling multiple apps. Workflow tip: use the Scratch Pad feature to test arrangement ideas without destroying your main timeline — it’s like having a sandbox inside your project.

    Bitwig Studio

    Bitwig — best for experimental electronic creators and Linux users. Its modular device system and live performance features blur the line between DAW and instrument, which is exciting for creators who want fresh sounds fast. Bitwig runs $399 for the full version or $16.99/month, and it’s one of the only professional DAWs with native Linux support. The Grid — Bitwig’s modular synthesis environment — lets you build custom instruments and effects from scratch, which is catnip for sound designers. The multi-track clip launcher rivals Ableton’s Session View and arguably handles audio clips better. Limitation: smaller community and fewer tutorials than the big names, so you’ll be doing more self-guided learning. Plugin compatibility is excellent though — it handles VST3 and CLAP natively. Ideal for experimental musicians, electronic artists, and Linux-based creators who want something that feels genuinely modern. Workflow tip: use the Operators (note/audio) to create generative sequences — great for ambient backgrounds and evolving textures in video content.

    DAW Comparison Table

    DAW Price Platform Best For Learning Curve Live Streaming
    Ableton Live $99–$749 Windows, macOS Live performance, looping, beat-making Moderate Excellent
    Logic Pro $199.99 (one-time) macOS only Composing, scoring, all-round production Moderate Good
    Cubase $99–$579 Windows, macOS MIDI, orchestration, film scoring Steep Limited
    Pro Tools $9.99–$39.99/mo Windows, macOS Mixing, broadcast, podcast post-production Steep Limited
    FL Studio $99–$499 (lifetime updates) Windows, macOS Beat-making, fast production Easy–Moderate Good
    Studio One $99–$399 Windows, macOS Recording, mixing, mastering Easy–Moderate Fair
    Bitwig Studio $399 or $16.99/mo Windows, macOS, Linux Experimental, electronic, sound design Moderate–Steep Excellent

    Free DAWs Worth Considering

    Not every creator needs to spend money on a DAW right away. If you’re starting out, testing a new workflow, or just need basic audio editing, there are legitimate free options that won’t embarrass you.

    GarageBand (macOS/iOS)

    If you own a Mac, you already have a surprisingly capable DAW. GarageBand shares Logic Pro’s core engine and includes Drummer tracks, a decent loop library, and enough instruments to produce complete tracks. It’s the best on-ramp to Logic — projects transfer seamlessly when you’re ready to upgrade. Limitation: no third-party plugin support and limited mixing tools. But for podcast intros, YouTube background music, and learning production basics, it’s hard to beat free.

    Audacity

    Audacity is not a DAW in the traditional sense — it’s a destructive audio editor. But for podcasters, voiceover artists, and creators who need to clean up recorded audio, it does the job. Noise removal, normalization, and basic editing are all solid. Don’t try to produce music in it. Do use it for quick audio cleanup before importing into your main DAW.

    LMMS

    An open-source DAW that runs on Windows, macOS, and Linux. LMMS is modeled loosely on FL Studio’s workflow with a beat/bassline editor and piano roll. The built-in synths are decent for electronic production. It’s rough around the edges — the UI feels dated and plugin compatibility can be spotty — but for a zero-dollar beatmaking tool, it punches above its weight.

    Cakewalk by BandLab (Windows)

    Formerly a paid product (Cakewalk SONAR), now completely free. This is a full-featured DAW with unlimited tracks, VST3 support, and a capable mixing console. For Windows users on a budget, it’s the best free option by a wide margin. The catch: BandLab’s long-term plans for the software are unclear, so don’t build your entire career workflow around it without a backup plan.

    Pricing Breakdown

    DAW Entry Tier Mid Tier Full/Pro Tier Model
    Ableton Live Intro — $99 Standard — $449 Suite — $749 One-time purchase
    Logic Pro $199.99 (single edition, all features included) One-time purchase
    Cubase Elements — $99 Artist — $329 Pro — $579 One-time purchase
    Pro Tools Artist — $9.99/mo Studio — $39.99/mo Flex — custom pricing Subscription
    FL Studio Fruity — $99 Producer — $199 All Plugins — $499 One-time + lifetime updates
    Studio One Artist — $99 Professional — $399 One-time purchase
    Bitwig Studio $16.99/mo $399 One-time or subscription
    GarageBand Free (included with macOS/iOS) Free
    Cakewalk Free (full-featured) Free

    How to Choose: Decision Framework

    Stop reading comparison articles (yes, including this one) and answer four questions:

    1. What do you actually ship? If it’s livestream music, you need clip-launching and low latency — Ableton or Bitwig. If it’s scored YouTube videos, you need video sync and MIDI — Logic or Cubase. If it’s beats and tracks as content, you need fast sequencing — FL Studio. If it’s podcasts, you need clean editing — Pro Tools or even Audacity.

    2. What platform are you on? Mac-only opens up Logic (best value in the entire list). Linux narrows you to Bitwig, LMMS, or Audacity. Windows gives you the most options.

    3. What’s your real budget? Be honest. If you’re spending $500+ on a DAW before you’ve made a dollar from audio, you’re optimizing the wrong thing. Start with GarageBand or Cakewalk, learn what you actually need, then buy with intent.

    4. Do you collaborate? If you send sessions to studios or other producers, Pro Tools and Ableton have the widest compatibility. If you work alone, use whatever makes you fastest.

    What this means for creators

    Pick your DAW by the projects you actually ship. Want to stream improv sets? Ableton or Bitwig. Need video scoring and MIDI depth? Cubase or Logic. Delivering professional mixes for clients and broadcast? Learn Pro Tools. And a practical note: don’t overspend on “all plugins” bundles until you know which effects you actually use — most creators are fine with stock plugins + 1-2 staples.

    Also keep an eye on two trends: better native support for spatial/immersive audio (Pro Tools and others are pushing this), and deeper live‑streaming integrations (low-latency monitoring, multichannel routing). Expect more DAWs to add creator-friendly features like clip export for social platforms and streamlined stems workflows in 2026.

    Frequently Asked Questions

    Can I use a free DAW for professional content?

    Yes — with caveats. GarageBand and Cakewalk can produce audio that listeners cannot distinguish from paid tools in a blind test. The difference is workflow speed and advanced features. If you’re producing podcast intros, YouTube background tracks, or simple sound design, a free DAW is perfectly fine. Once you’re regularly hitting walls — needing third-party plugins, better mixing tools, or advanced MIDI — that’s when you upgrade. Don’t let gear snobbery convince you that your $0 tool can’t make good content. It can.

    Which DAW is best for podcasters?

    For pure podcast editing, you arguably don’t need a full DAW at all. Audacity handles basic recording and cleanup. If you want something more polished — intro music, sound effects, multi-track interviews — Logic Pro (Mac) or Studio One (cross-platform) offer the best balance of simplicity and power. Pro Tools is overkill for most podcasters unless you’re doing heavy post-production or distributing to broadcast networks that require specific deliverables.

    Do I need an audio interface with my DAW?

    For recording anything beyond screen audio — yes. A USB audio interface ($100-$200 range: Focusrite Scarlett Solo, PreSonus AudioBox, Audient iD4) gives you lower latency, cleaner preamps for microphones, and proper headphone monitoring. Your laptop’s built-in audio will introduce latency and noise that no DAW can fix. If you’re only working with samples, loops, and MIDI instruments, you can get by with built-in audio. The moment you plug in a mic or guitar, get an interface.

    TL;DR

    There’s no single “best” DAW — there’s the best DAW for your workflow. Ableton for live/looping, Logic for Mac-based composers, Cubase for MIDI/orchestration, Pro Tools for pro-grade mixing, FL for fast beatmaking, Studio One for balanced workflows, and Bitwig for creative experiments. Choose workflow over hype, and beware platform lock-in and subscription traps.

  • Canon R50V vs Sony ZV-E10 vs Nikon Z30: Best Beginner Vlogging Camera (2026)

    Canon R50V vs Sony ZV-E10 vs Nikon Z30: Best Beginner Vlogging Camera (2026)

    I spent two weeks swapping between the Canon R50V, Sony ZV‑E10, and Nikon Z30 like a caffeinated octopus-daily street vlogs, sit-down talking heads, a night market, and two livestreams. I’m a creator who cares about color, skin tones, and not missing focus when I wave a product at the lens. I shoot 70% video, 30% photos for thumbnails. My kit for this test: kit zooms on each system, plus the Nikon Z DX 12-28 PZ (borrowed), a Sigma 18-50mm f/2.8 on the Sony, and a cheap on-camera shotgun. This isn’t a lab chart review; it’s what actually happened when these cameras lived in my backpack.

    • Key takeaways:
    • Sony ZV‑E10 is the most creator-savvy for autofocus and features, but watch heat and rolling shutter.
    • Canon R50V is the easiest to learn and gives lovely color; lens ecosystem is the blocker.
    • Nikon Z30 is the sleeper hit for long takes and stress-free streaming; AF is good, not magical.
    • No IBIS on any of them-lenses and technique matter more than you think.
    • Lens costs/choices will shape your channel more than a tiny spec difference in sensors.

    My setup and first impressions

    Day 1 was a city walk vlog. I rotated bodies on the same mini tripod and shot the same route, mid-afternoon. The ZV‑E10 immediately felt like it “gets” creators: big red tally lamp, a “Background Defocus” button that slams the aperture open, and the one-tap Product Showcase mode that shifts focus from face to object without hunting. The Canon R50V (think: Canon’s vlogger-leaning R50 kit) gave me that “ahhh, Canon color” right out of the box-skin tones that looked flattering without fiddling. The Nikon Z30 surprised me with the most comfortable handgrip and the simplest selfie controls when the screen was flipped forward. It’s not as shouty as Sony about being a vlogging camera, but in use, it’s calm and competent.

    Small but important note: all three are APS‑C. Sony’s APS‑C is a hair larger than Canon’s and Nikon’s crop factor on paper, but the real low-light difference I saw was less about sensor size and more about the lens I put in front of it and how aggressive the camera is with noise reduction. Keep that in mind when you see “better low light” claims floating around.

    Image and color: do you like your face?

    By hour 5, I stopped pixel peeping and started asking: which file makes me do less work? Canon R50V did. Out-of-camera, its default colors gave me pleasing skin with less green tint. My partner, who usually hates how cameras render her freckles, preferred the Canon clips without any grading. Sony with S‑Cinetone was a close second; it gives a softer, modern YouTube vibe, but you need to turn it on and tweak exposure slightly. Nikon looked clean and neutral; switch to the “Flat” profile and you’ve got a decent base for a 60-second grade if you care to do that.

    Sharpness? All three oversample 4K 30p and look crisp. The difference showed up when I panned: the ZV‑E10’s rolling shutter is the most visible—vertical lines bend if you whip the camera. The R50V handled pans better, and the Z30 sat between them. If you do a lot of energetic handheld walk-and-talks with fast pans, budget for wider lenses and slower moves, especially on the Sony.

    Autofocus and “creator tricks” that actually matter

    Autofocus drama decides careers. Okay, maybe not careers, but it absolutely decides whether I reshoot. Sony’s face/eye AF is still the most confident in video. The moment I realized it: I held a pocket light six inches from the lens and it snapped to the product, then popped back to my eye with zero hunting. On the Canon, Dual Pixel AF II is excellent—you can trust it—but when I blocked my face with a box for longer than a second, it sometimes hesitated before returning to eyes. The Nikon rarely missed me, but it didn’t feel as sticky when I moved unpredictably. That said, the Nikon never did the “micro-pulse” jitter that sometimes appears on Sony in tricky backlight—credit where it’s due.

    Feature-wise, Sony’s Product Showcase and Background Defocus buttons are not gimmicks if you do beauty, tech, or cooking. You can feel the camera was designed with the “hold to camera” gesture in mind. Canon’s subject detection is smart (people, animals), and the touch-to-track on the R50V is delightful. Nikon’s “selfie controls” that surface big on-screen buttons when flipped forward are honestly underrated; less diving into menus, more shooting.

    Stabilization: the hard truth about handheld

    None of these bodies have in-body stabilization (IBIS). You get electronic stabilization (with a crop) and whatever the lens can do. This caught me on Day 2: my coffee shop walk-and-talk looked fine on the Canon with digital IS, until I noticed the warpy corners—that jelly wobble when you sway. Sony’s Active SteadyShot did a similar thing. Nikon’s e-VR was the least warpy to my eyes, but the crop is noticeable. The single biggest upgrade I felt across all three was a wider power zoom: Sony’s 10-20mm PZ, Nikon’s 12–28mm PZ, or even a cheap Ulanzi handheld rig to push the camera a bit farther from your face. If you care about that cinematic glide, a mini gimbal still beats all of this.

    Audio: the sound of not hating your edits

    Internal mics have come a long way, but I still pack a small shotgun or lav. The ZV‑E10’s built-in directional mic with the included wind muff did the best job cutting down café noise in my tests. Canon and Nikon sounded acceptable indoors; outside, both picked up more wind and car hiss. If you want to keep your setup clean, the Sony’s Multi Interface Shoe with digital audio mics (like the ECM series) is slick—no cables. Canon’s multi-function shoe on the R50V can also pass digital audio with compatible mics, which is nice. Nikon’s shoe is standard analog; no digital passthrough, but regular 3.5mm works fine. For pure portability, Sony felt like the easiest way to get “good enough” audio without extra cabling.

    Heat, battery, and the not-so-glam stuff

    I did two controlled tests: a 4K/30 talking head indoors at ~72°F (22°C), and a 1080/60 stream to a private channel. Same lights, same distance, no fans.

    • Sony ZV‑E10: 4K/30 recorded for 42 minutes before a high-temp shutdown. With “Auto Power OFF Temp” set to High, I got 55 minutes, then it bowed out. For 1080/60 streaming via USB (UVC), it ran for 2 hours without drama. Battery is rated higher on paper (I averaged ~100–110 minutes of mixed clips per battery), but 4K chews it fast—carry two spares.
    • Canon R50V: My unit did 31 minutes at 4K/30 before stopping on heat. Swapping to 1080/30, it recorded a full hour. Streaming over USB was stable at 1080/30. Battery felt like the shortest in practice; around 70–90 minutes of active shooting per pack.
    • Nikon Z30: This is the sleeper. It ran 4K/30 for 75 minutes in my room before I stopped it on purpose (no hard 30-min cap). It also chugged through a 90-minute 1080/60 stream via HDMI+capture card without flinching. Real-world shooting gave me similar battery to Canon, ~90 minutes per EN‑EL25, but thermals were clearly better.

    None of this is uncommon—small bodies are thermally constrained. If your content is long-form talking heads or podcasts, I’d rank Z30 first, then ZV‑E10, then R50V. For short-form bursts, they’re all fine; just build your workflow around clips instead of marathons.

    Menus, screens, and creator workflow

    Screens: all three have flip-out vari-angle LCDs. Sony’s screen is the smallest-feeling, but bright enough under shade. Canon’s is the most color-accurate in my eyes, which matters when you dial white balance manually. Nikon’s is roomy with big touch targets in selfie mode—love that.

    Menus: Sony’s ZV‑E10 uses the older menu logic. It’s not terrible once you favorite your items, but it’s 2025—I wish it had the newer UI. Canon’s guided modes on the R50V are money for true beginners; it explains choices like you’ve got a coach in the camera. Nikon’s UI is clear and predictable, especially if you’ve touched Nikon before. For touch controls, Canon wins; for quick-toggling true creator features, Sony still feels faster.

    Connectivity: all three did clean HDMI and USB streaming for me. The ZV‑E10 output 1080/60 clean over USB to OBS. Canon and Nikon were solid at 1080/30 via USB (you can do higher via HDMI with a capture card). File transfer apps were fine—Sony Imaging Edge was the least crashy on my phone, Canon’s worked but nags you more, Nikon’s SnapBridge paired quickly after the first cranky try.

    Lenses and the money reality

    This matters more than any single spec. Sony’s E‑mount wins on sheer variety and price. I grabbed a Sigma 18–50mm f/2.8 for the ZV‑E10 and it turned nighttime street food into usable footage without cranking ISO to the moon. For ultrawide vlogging, the Sony 10–20mm PZ is expensive but brilliant—featherweight and power zoom for smooth framing solo.

    Canon’s RF‑S lens options are improving, but affordable third‑party autofocus choices are still limited compared to Sony. The RF‑S 18–45 kit is compact but slow; for that signature blurry background, you’ll feel stuck unless you invest in faster glass. If Canon is your pick, I’d budget for at least one fast prime for talking heads.

    Nikon Z DX lenses are fewer than Sony’s, but the Z DX 12–28mm PZ is a gem for vlogging: light, sharp, power zoom, and genuinely transforms the Z30 into a grab-and-go rig. For low light, the 24mm or 35mm Z primes are great for a desk setup. Third‑party options for Z‑mount have been growing—still not Sony levels, but it’s not a desert anymore.

    Who each camera is actually for

    • Sony ZV‑E10: If you do product demos, beauty, tech reviews, or any format where autofocus trickery and audio-in-a-hurry matter, this feels purpose-built. Just plan around heat for long 4K takes, learn to work with rolling shutter (wider lenses, slower pans), and carry extra batteries.
    • Canon R50V: If you’re brand new and want to love how you look without touching color wheels, this is the friendly door into mirrorless. Perfect for short vlogs, reels, and hybrid thumbnail photos. The main caveat is lens availability/cost—budget for glass.
    • Nikon Z30: If you’re streaming, podcasting, or recording extended sit-down content, this is the reliable mule. It doesn’t shout about creator features, but it quietly nails the long take while staying cool. Pair it with the 12–28 PZ or a fast prime and you’re golden.

    The specs versus the vibes

    On paper, these cameras look similar: 4K/30, flip screens, mic jacks, decent autofocus. After 10 hours of shooting, the “vibe” differences are what you feel:

    • ZV‑E10 feels like it was designed by someone who watches YouTube all day. The workflow is frictionless for creators.
    • R50V feels like it was designed by someone who cares how people look on-camera. The results are flattering and friendly.
    • Z30 feels like it was designed by someone who hates surprises. It just runs and doesn’t get sweaty under the lights.

    One correction I’ll stress because I see it repeated: the Sony isn’t “better in low light” because the sensor is bigger. They’re all APS‑C; what helped the Sony in my night tests was the availability of fast, affordable lenses and how it processes noise. Put the same fast lens on Canon or Nikon, and the gap shrinks fast.

    What worked, what didn’t (from actual use)

    • Sony ZV‑E10 — Loved: Product Showcase, easy clean audio with MI Shoe, S‑Cinetone out of camera. Didn’t love: rolling shutter, older menu logic, thermal cutoff in long 4K sessions.
    • Canon R50V — Loved: skin tones, touch UI, Dual Pixel AF confidence. Didn’t love: shorter battery and thermal headroom, limited affordable fast lenses in RF‑S.
    • Nikon Z30 — Loved: thermals and long recording, comfy grip, the 12–28 PZ lens pairing. Didn’t love: AF is “good” not “magic,” fewer creator-focused shortcuts, audio wind handling lags Sony.

    My verdict after two weeks

    If I had to pick one today for a new creator who’s serious about video: I’d buy the Sony ZV‑E10 and immediately pair it with one good lens (Sigma 18–50 f/2.8 if you’re inside a lot; Sony 10–20 PZ if you live outside). It’s honest about its limits, but the creator-first features and lens ecosystem make it the most adaptable tool.

    If you’re camera‑shy or allergic to color grading, the Canon R50V will make you love your face and your footage. It’s the easiest to recommend to someone who wants to be publishing tonight, not learning menus. Just plan your lens path early.

    If your content is long-form—streams, courses, hour-long monologues—the Nikon Z30 is shockingly dependable. It won me over precisely because it didn’t demand babysitting. It’s less flashy, more trustworthy.

    Bottom line and ratings

    • Sony ZV‑E10: 8.5/10 — Best all-around vlogging tool with creator features and lens value; mind the heat and RS.
    • Canon R50V: 8/10 — Easiest, prettiest starting point; ecosystem limits keep it from being my long-term pick.
    • Nikon Z30: 8/10 — The reliability king for long takes; fewer “wow” tricks, more “it just works.”

    My personal pick for video-first beginners: Sony ZV‑E10. My pick for “I want to look great with minimal effort”: Canon R50V. My pick for marathon recordings and streams: Nikon Z30.

    TL;DR

    • All three shoot sharp 4K/30 with flip screens. None have IBIS.
    • ZV‑E10 nails autofocus tricks and audio ease; best lens ecosystem; watch heat and rolling shutter.
    • R50V prints pretty skin right out of camera; smooth touch UI; shorter stamina and pricier lens path.
    • Z30 runs cool and long; great with the 12–28 PZ; AF is solid if not Sony-level sticky.
    • Choose based on your format: product/review vlogs (Sony), quick polished vlogs (Canon), long-form/streams (Nikon).
  • Canon R50 vs Sony ZV‑E1 vs Nikon Z30 — my real-world creator kit winner in 2026

    Canon R50 vs Sony ZV‑E1 vs Nikon Z30 — my real-world creator kit winner in 2026

    I spent two chaotic weeks juggling the Canon R50, Sony ZV‑E1, and Nikon Z30 across the exact stuff most of us actually do: a run-and-gun day vlog through a crowded street market, a three-camera studio livestream, short-form B‑roll with way too much coffee, and a weekend trip where weight mattered more than specs. I wanted to know which kit I’d actually trust to make deadlines without babysitting it. Short answer: they each have a lane. Long answer: let’s talk about what happened when the red light came on.

    • Key Takeaway #1: Sony ZV‑E1 is the “I’m paid to deliver” body-full-frame low light, 10‑bit, IBIS, and creator-friendly tools that save shots when everything else is on fire.
    • Key Takeaway #2: Canon R50 is the pound‑for‑pound value champ-great AF, nice color, an EVF for photos, and a compact kit that punches above its price if you can live without IBIS.
    • Key Takeaway #3: Nikon Z30 is the friendliest starter camera-clean 4K30, good AF, long clips without drama, and the best kit-lens stabilization vibe, but fewer “grow with me” options.
    • Key Takeaway #4: If you’re shooting handheld video a lot, stabilization matters more than spec sheets. IBIS on the ZV‑E1 is the difference between “usable” and “ugh, gimbal time.”
    • Key Takeaway #5: Ecosystem is destiny. Sony’s lens universe is the most creator-friendly, Nikon is getting there, and Canon’s RF‑S is solid but still selective with third-party AF options.

    My setup and why I cared

    My usual workflow: I shoot YouTube explainers, Instagram Reels, and a live show on Tuesdays. I prefer 24-30mm for talking heads at arm’s length, 10‑bit files when I’m mixing lights, and anything that lets me carry one body, two lenses, one mic. For this test:

    • Sony ZV‑E1 with Sony 20mm f/1.8 G and 16-35mm f/4 PZ. Rode VideoMic Go II on top. No gimbal, IBIS only.
    • Canon R50 with RF‑S 18-45mm kit and RF 16mm f/2.8. DJI Mic 2 for the livestream. Handheld plus a tiny travel tripod.
    • Nikon Z30 with DX 16–50mm VR and Z 24mm f/1.7. On-camera mic + a small grip. No EVF on the Z30, which I thought I’d hate, but for vlogging it’s fine.

    I shot in 4K 24/30 for the main footage and 1080p 120/240 for slow‑mo inserts. For streaming, I used HDMI into a capture card for all three to keep the playing field even.

    First impressions after day one

    The ZV‑E1 felt like a tiny cheat code. It’s small for a full-frame, but still chunky enough to grip with a 20mm f/1.8. No EVF—which I knew—but I didn’t miss it for video. The IBIS plus Active stabilization let me walk and talk without praying to the post-stabilization gods. Colors out of S‑Cinetone were the closest to “uploadable without grading.”

    The R50 surprised me with how “camera‑y” it felt for the price. Proper EVF (useful for photos), fully articulating touch screen, and Canon’s Dual Pixel AF just glued to faces. No IBIS, though. Digital IS helped, but it adds a crop and sometimes that minor “warp” at the edges on wider lenses. I felt it most with the RF 16mm.

    The Z30 felt like a vlogger first, camera second—which I mean nicely. It’s simple, no viewfinder, big REC tally lamp, and the 16–50mm VR kit lens stabilizes better than its price says it should. It won me over in the first hour by not doing anything weird. Predictable is underrated.

    Autofocus: three ways to trust your face

    I test AF by doing the stuff that breaks it: glasses on/off, hand‑to‑lens product throws, backlit windows, and walking past busy backgrounds.

    • Sony ZV‑E1: Real‑time Eye AF is sticky like honey. It tracked me with a hat and glasses while I crossed a street with signs and people behind me. The “Product Showcase” toggle still feels magical—hold a product to frame, it jumps focus instantly, then back to my face without hunting. I had maybe one miss in an afternoon of chaos.
    • Canon R50: Dual Pixel CMOS AF II is excellent—fast, confident, and reliable. The face/eye detection very rarely picked the background over me. For sit‑down talking heads, it’s a lock. For walk‑and‑talks, it kept up, but you can feel it’s working a touch harder than Sony.
    • Nikon Z30: Better than I expected. For straight-on vlogging, it latched onto my face nicely. The “product to face” handoff is slower; you can see it think. In low light, it hunted a couple of times where the Sony didn’t.

    Winner: Sony, then Canon in a very close second. Nikon is fine for basics but not my pick for rapid product shots or tricky backlight.

    Video quality and the low‑light reality

    Here’s where sensor size shows up. The ZV‑E1’s full-frame look with a 20mm at f/1.8 gives you that clean separation without screaming “cinema cosplay.” In my 8pm street market test (mixed neon and sodium vapor), the ZV‑E1 files were cleaner at ISO 12,800 than the APS‑C cameras were at 6400—and with richer color in the shadows. Noise isn’t just about grain; it’s about how skin tones survive the shadows, and Sony’s 10‑bit profiles give you room to fix bad lighting decisions later.

    The R50’s 4K30 oversampled footage looks sharp and honest. Canon’s color science still flatters skin without much fuss. I shot a talking head under cheap LED panels and could live with the footage straight out of camera. Rolling shutter shows up during fast pans more than on the Sony; it’s not a deal-breaker, just a “don’t whip pan” note.

    The Z30’s 4K30 is absolutely usable and, paired with the stabilized 16–50mm, produced the steadiest handheld footage of the APS‑C pair. In lower light, it gave up earlier—skin tones went a little gray and contrasty as ISO climbed. Color is pleasant but less forgiving in post since you’re limited to 8‑bit.

    Slow motion: Sony’s 4K 60 looks gorgeous, and with the firmware upgrade, 4K 120 is available (with a crop and typical S&Q caveats). 1080p 240 is a nice trick for product splashes and hair flips—soft but fun. Canon and Nikon top at 1080p 120, which is still fine for most edits. If your brand leans on buttery slow‑mo B‑roll, Sony’s the adult in the room.

    Stabilization and handheld sanity

    IBIS is one of those features you don’t think you need—until you do. On the ZV‑E1, 5‑axis IBIS plus Active stabilization let me do a 7‑minute walking monologue at 20mm with minimal bob. Not gimbal smooth, but very “YouTube real.” Dynamic Active adds more crop and more smoothing; I used it once on a tight path and it saved the shot.

    Canon R50’s Digital IS helps, but it crops and can add that subtle “wobble” at the edges on ultrawide lenses. With the RF‑S 18–45 at the wide end, it was okay. With the RF 16mm, I’d rather add a cheap grip or monopod and leave Digital IS off unless I’m desperate.

    Nikon Z30 relies on lens VR and electronic VR. With the 16–50mm, it was shockingly smooth at 16mm; that lens is the unsung hero of the kit. Electronic VR adds a crop but felt less warpy than Canon’s with similar settings.

    Audio, monitoring, and the long‑record test

    Audio matters more than people admit. Here’s the deal:

    • Sony ZV‑E1: 3.5mm mic in + headphone out. Monitoring your audio is a huge relief when you’re one‑person‑banding. Sony’s built‑in mic shield and wind muff are decent in a pinch.
    • Canon R50: Mic in, no headphone jack. I monitored via my recorder and lived to tell the tale, but I missed headphones on the camera during a live segment. For studio setups, it’s fine. For chaotic environments, you’re flying a little blind.
    • Nikon Z30: Mic in, no headphone out. I relied on meters and trust. The front tally lamp is great, though—instant confidence you’re recording.

    Recording limits and heat: I set all three to 4K and hit record. At 22°C/72°F indoors, the Z30 cruised past an hour in 4K30 without complaining—nice for webinars or cooking videos. The R50 gave me a thermal warning around the 45‑minute mark in 4K30 and tapped out a bit after; totally fine for normal creator cuts, but I wouldn’t count on marathon clips. The ZV‑E1 in 4K60 lasted through my 70‑minute segment on the “High” temperature setting before I swapped batteries and moved on. In hotter rooms, plan accordingly. None of this is shocking; it matched what other shooters have told me.

    Menus, buttons, and the “do I need a third hand?” test

    I live in menus more than I’d like. Sony’s latest menu system is finally good: the Fn menu plus touch makes quick changes painless. The ZV‑E1 adds creator‑specific one‑taps—Background Defocus, Product Showcase, Auto Framing—that actually saved me time. I never used to trust those modes; now I do.

    Canon’s touch interface is the easiest for beginners. Tap‑to‑focus works how you think it should. The Q menu is clean, and the EVF on the R50 (2.36M‑dot) is there when you want proper framing for photos. Bonus: Canon’s subject detection nailed my dog sprinting across frame while I was in stills mode.

    Nikon’s i‑menu gets you to the essentials fast. The Z30 body feels friendly—dedicated video record button up top, nice deep grip, and no EVF hump in your face. It’s the least intimidating camera here.

    Lens ecosystems: where you’ll spend real money

    This part matters more than the body. After two weeks, here’s how it felt:

    • Sony E‑mount (ZV‑E1): it’s a playground. Native lenses from Sony cover everything, and third‑party options from Sigma, Tamron, Viltrox, etc., are mature. For creators specifically, the 16–35 PZ is a gem for hand‑held vlogging, and the 20mm f/1.8 G is basically “make my room look nicer” in lens form.
    • Canon RF/RF‑S (R50): RF‑S is growing. You’ve got compact options like the RF‑S 18–45 and the RF 16mm f/2.8 for vlogging. Adapting older EF glass works well and opens the floodgates, but native third‑party AF lenses are still limited compared to Sony. If you already own EF lenses, the R50 becomes a lot more interesting.
    • Nikon Z DX (Z30): fewer APS‑C options, but the essentials are covered. The 16–50 VR is way better than a kit lens has any right to be, and Nikon’s fast little Z 24mm f/1.7 is tailor‑made for creators. Third‑party AF lenses on Z mount have been increasing, which helps future-proofing.

    What worked for me—and what didn’t

    • Sony ZV‑E1 — Loved: low‑light and 10‑bit latitude, IBIS that makes arm’s‑length vlogs real, headphone jack, creator shortcuts (Product Showcase, Auto Framing). Didn’t love: no EVF for photo days, full-frame lenses can front‑weight the tiny body, price stings but you do feel where the money goes.
    • Canon R50 — Loved: Canon color, excellent AF, EVF for photo sessions, simple touch UI, surprisingly crisp 4K30. Didn’t love: no IBIS, no headphone port, and the digital IS crop/warp at the wide end makes ultrawide vlogging trickier.
    • Nikon Z30 — Loved: pleasant out‑of‑camera look, long 4K takes without drama, best “beginner confidence” ergonomics, kit lens stabilization is great. Didn’t love: no EVF option at all, 8‑bit only, AF can hesitate with product tosses and low light.

    Technical notes that actually mattered

    • Bit‑depth/codecs: ZV‑E1’s 10‑bit 4:2:2 is the “fix it in post” safety net. R50 can do HDR PQ but in day‑to‑day I treated it like an 8‑bit camera. Z30 is 8‑bit—shoot for what you see, not heavy grading.
    • Rolling shutter: most visible on the R50 and Z30 during fast pans; the Sony handled movement better. Solution: don’t whip pan, and use wider lenses when moving.
    • Battery life (my real numbers): ZV‑E1 did a full afternoon (around 2.5 hours of mixed shooting) on one NP‑FZ100. R50 tapped out in ~90 minutes of similar use on an LP‑E17. Z30 lasted a hair longer than the R50 on an EN‑EL25.
    • Webcam/streaming: all three worked clean over HDMI. USB streaming quality varies by brand and mode; HDMI kept things simple and consistent for my Tuesday show.

    Who should pick which—and why

    • Pick Sony ZV‑E1 if your content lives or dies on handheld video quality, low light, and color flexibility. If you’re delivering to clients or your brand aesthetic leans moody/cinematic, it’s worth the spend. It’s the only one here that genuinely replaces a gimbal sometimes.
    • Pick Canon R50 if you’re stepping up from a phone and want a camera that just makes good stuff with minimal fiddling—and you also shoot photos. Pair it with the RF 16mm for vlogging and an adapted EF 50mm for portraits, and you’ve got range without breaking the bank.
    • Pick Nikon Z30 if you want the friendliest onramp to “real camera” video: straightforward controls, stabilized kit lens, and long takes for streams or classes. Add the Z 24mm f/1.7 and your A‑roll looks instantly pro.

    Personal verdict after 10 days

    I started thinking the R50 would be the sleeper hit—and in a lot of ways, it is. For the money, it’s silly good. But the moment I had a wobbly one‑take I couldn’t redo, the ZV‑E1’s IBIS and 10‑bit files saved me. That one clip changed my mind about which camera I’d actually buy with my own money for video‑first work.

    That said, I’ve got a soft spot for the Z30 now. It’s the camera I’d hand to a friend who’s starting a channel and doesn’t want to learn a camera before learning YouTube. There’s real power in “doesn’t get in the way.”

    My picks:

    • Overall creator winner: Sony ZV‑E1 (9/10) — the best safety net in bad light, bad hands, and bad luck.
    • Best value/hybrid starter: Canon R50 (8/10) — great color, EVF, and autofocus; just plan for no IBIS.
    • Best beginner vlogger: Nikon Z30 (7/10) — steady, friendly, and dependable within its lane.

    Bottom line

    If your content is video‑first and you’ve got paying clients or tight turnarounds, the ZV‑E1 is the camera that gives you the most keepers with the least babysitting. If you’re building a channel, learning the ropes, and also care about photos, the R50 is the “trusty sidekick” that won’t drain your account. If you’re budget‑minded and want a clean, stable vlogging setup with long record times, the Z30 is quietly excellent—especially with that 16–50 VR.

    TL;DR

    • Sony ZV‑E1: Full‑frame, IBIS, 10‑bit, crazy good AF. Pricier, no EVF, but the most “I got the shot.”
    • Canon R50: APS‑C, no IBIS, excellent AF/color, EVF for photos. Best value for hybrid creators.
    • Nikon Z30: APS‑C, no EVF/IBIS, long 4K takes, stable kit lens. Easiest on‑ramp for new vloggers.

    My wallet says R50. My calendar says ZV‑E1. My beginner friends get the Z30. Pick your battles, not just your specs.

  • 12 Best Free & Budget Color Grading Software Tools (2026)

    12 Best Free & Budget Color Grading Software Tools (2026)

    Top 12 Budget-Friendly Color Grading Tools for 2025

    Remember when color grading meant big studio budgets? Now it’s a few clicks away—if you’re willing to learn by fire. After dozens of late-night renders chasing that ideal teal and orange, I’ve rounded up 12 free and wallet-friendly grading tools that actually work on client gigs, YouTube Shorts, and branded reels. Let’s roll.

    But first—whether you’re brand new to post-production or just tightening your pipeline—let’s clear up the one question that trips up almost everyone.

    What Is Color Grading vs Color Correction?

    Color correction is the clinical part. You’re fixing white balance, adjusting exposure, and making sure your footage looks natural and consistent shot to shot. Think of it as the dental cleaning—necessary, unglamorous, and nobody notices unless you skip it.

    Color grading is the creative layer on top. It’s where you push teal into the shadows, warm up skin tones, or slap a filmic look across your timeline that says “I meant to do that.” Correction makes your footage accurate. Grading makes it yours. Most of the tools below handle both, but knowing which step you’re on saves hours of going in circles. Always correct first, grade second.

    The 12 Best Free and Affordable Color Grading Tools

    1. DaVinci Resolve (Free & Studio)

    Trading Premiere for Resolve feels like swapping a tricycle for a spaceship. Node-based workflows, precision curves, LUT support, facial recognition and Blackmagic’s free training make it the pro standard at zero cost.

    The Color page alone justifies the install—color wheels, curves, qualifier selections, power windows—tools that would cost hundreds elsewhere. The node graph lets you stack corrections non-destructively, so your creative grade sits cleanly on top of your technical fix. The free version skips HDR Dolby Vision and Neural Engine features like Magic Mask (Studio is $295 one-time), but for 90% of YouTube and social content, the free tier is overkill in the best way. Best for anyone willing to invest a weekend learning nodes.

    Pro Tip: Hit up Blackmagic’s official tutorials to master HDR grading and multi-cam matching in record time.

    2. CapCut

    Once “too TikTok” for me, CapCut now rules my mobile and desktop edits. One-tap LUTs, manual color controls, cloud sync and rapid updates let you polish quick stories and reels between coffee breaks.

    The desktop version quietly became a serious editor. HSL adjustments, tone curves, and a keyframe system for animated grades. The AI-powered filters are surprisingly tasteful—less “Instagram 2012” and more “I hired a colorist.” Cloud sync lets you rough-cut on your phone and fine-tune on desktop. Export quality on the free tier can be inconsistent, but for short-form creators who need speed over pixel-level control, nothing beats it.

    Workflow Tip: Build a custom preset from your best-graded clip and apply it as a starting point to every new project. CapCut saves presets across devices.

    3. Adobe Premiere Rush

    If you’re deep in the Adobe ecosystem, Rush’s Auto Color cleans up about 80% of your clips instantly. Seamless cloud syncing and broadcast-safe presets keep your edits tight across desktop and mobile.

    Rush isn’t trying to be Premiere Pro—it’s trying to be fast. Exposure, contrast, highlights, shadows, vibrance, and curated looks. A full color pass on a 3-minute vlog takes five minutes. The downside: subscription cost if you’re not already on Creative Cloud, and power users will hit the ceiling fast—no curves, no wheels, no scopes. Best for Adobe subscribers who want quick mobile-to-desktop edits.

    4. VSDC Free Video Editor

    On a crusty Windows laptop, VSDC’s RGB curves, LUT imports, masking and chroma-key tools rescued me from Movie Maker purgatory. The interface is retro, but the community LUT swaps are pure gold for moody docs.

    VSDC punches above its weight for a free Windows-only editor. Lift/gamma/gain wheels, color scopes, and split-toning controls that most free tools skip. It runs on CPU rather than GPU—great on older hardware, limiting on newer projects. The UI takes getting used to, but once you map your shortcuts it’s a workhorse. Best for Windows users on older machines who need real grading tools at zero cost.

    5. Lightworks (Free & Pro)

    My first editing crush, Lightworks still delivers real-time scopes, broadcast-safe grading tools and GPU acceleration. The free version caps exports at 720p, but it nails your look before you decide if Pro is worth it.

    Lightworks has Hollywood pedigree—it cut “The Wolf of Wall Street” and “Pulp Fiction.” Vectorscope, waveform, histogram, and a grading panel built around broadcast standards. If you’re learning scopes for the first time, Lightworks makes them approachable. The 720p cap is irrelevant for learning; for client delivery, Pro is $9.99/month. Best for beginners who want scope-based grading in a professional environment.

    6. HitFilm Express

    After wrestling with After Effects, HitFilm’s free color wheels, curves, LUTs and built-in VFX felt like a warm hug. Just watch your RAM when stacking multiple effects.

    HitFilm’s killer combo is editing plus compositing in one app. Three-way color wheels, hue/saturation curves, and solid LUT imports. The VFX integration means your grade plays nicely with motion graphics—no round-tripping. RAM management is the Achilles’ heel though. Close background apps and work in proxy mode for complex timelines. Best for creators who blend VFX and color grading in the same project.

    7. iMovie

    Don’t sleep on iMovie. Its Auto Color and intuitive sliders crank out polished family clips and branded bangers on Mac in minutes. It’s shallow but lightning-fast when you need speed over depth.

    iMovie does one thing brilliantly: it gets out of your way. Brightness, contrast, saturation, color temperature, and a handful of cinematic filters. No curves or color wheels—and that’s the point. For quick turnaround content where “looks good” beats “looks graded,” iMovie wins on time-to-export. If you shoot on iPhone, the integration is seamless. AirDrop, grade, export. Five minutes. Best for Mac and iPhone users who prioritize speed over creative control.

    8. Cinema Grade

    Point-and-click grading inside Premiere, Final Cut or Resolve. Live previews, scene presets and a Match tool for multi-cam shoots make it a workflow booster once you’ve outgrown the basics.

    Cinema Grade’s trick is visual grading—click on the part of the image you want to adjust (sky, skin, shadows) and drag. No hunting for the right node or wheel. The scene-matching feature saves time on interview shoots where lighting shifts between setups. At $99 one-time it’s the priciest here, but it pays for itself on the first multi-cam project. Best for intermediate editors who want faster results inside their existing NLE.

    9. Color Grading Central LUT Gallery

    This curated LUT shop lets you test film-style presets on your own footage before you buy. Free sample packs and NLE integration saved me hours on a moody short.

    The try-before-you-buy model sets CGC apart from the dozens of random LUT packs online. Upload a still from your project, preview the LUT applied, and decide if it fits. The free packs—especially the film emulation ones—are genuinely usable, not watered-down teasers. Apply one, dial back intensity to 60-70%, and tweak from there. Best for creators who want a cinematic starting point without building looks from scratch.

    10. OpenColorIO (OCIO)

    The backstage hero for color consistency in 3D, VFX and live-action. My Blender and Nuke projects fall apart without it. Open-source, rock-solid and a must if you despise color chaos.

    OCIO isn’t an editor—it’s a color management framework. It ensures what you see in Blender matches what comes out of Nuke matches what lands in Resolve. For multi-app pipelines, that consistency is non-negotiable. Setup takes effort—config files, display transforms, possibly cursing at YAML syntax—but once running, your pipeline stays color-accurate end to end. Best for VFX artists working across multiple applications.

    11. Blender Video Sequence Editor (VSE)

    Blender’s VSE brings node-based grading into the open-source world. Link your animation or comp directly and tweak curves without hopping between apps. The community docs are a big plus.

    If you’re already in Blender for 3D, the VSE keeps everything under one roof. Color balance and curves modifiers work well, and the compositor’s node system handles complex grades that would need plugins elsewhere. Playback can chug on heavy timelines, but for animation and VFX projects where grading is part of compositing, it eliminates unnecessary exports. Best for Blender users who want to grade without leaving the ecosystem.

    12. Olive Video Editor

    Still in alpha but already packing real-time grading in a clean interface. Discord-driven LUT experiments, frequent updates and a sleek design make Olive perfect for early adopters hungry for fresh features.

    Olive feels like what a modern open-source NLE should be: fast, clean, focused. Curves, color balance, and LUT support are already in place, and the real-time playback is impressive for alpha software. The risk: alpha means crashes and breaking changes. Don’t use it for client work yet, but keep it installed and watch it grow. Best for tinkerers and open-source advocates.

    Comparison Table

    Tool Price Platform Best For Learning Curve
    DaVinci Resolve Free / $295 Studio Win, Mac, Linux Serious grading at any level Steep
    CapCut Free / Pro plans Win, Mac, iOS, Android Short-form social content Easy
    Premiere Rush Free / $9.99/mo Win, Mac, iOS, Android Quick edits in Adobe ecosystem Easy
    VSDC Free / $19.99 Pro Windows Budget Windows editing Medium
    Lightworks Free / $9.99/mo Win, Mac, Linux Learning broadcast-grade tools Medium
    HitFilm Free / paid add-ons Win, Mac VFX + color in one app Medium
    iMovie Free Mac, iOS Fast Mac/iPhone edits Easy
    Cinema Grade $99 one-time Win, Mac (plugin) Visual grading in your NLE Easy
    CGC LUT Gallery Free samples / paid packs Any NLE Quick cinematic looks Easy
    OpenColorIO Free (open-source) Win, Mac, Linux Multi-app color consistency Steep
    Blender VSE Free (open-source) Win, Mac, Linux 3D/VFX pipeline grading Steep
    Olive Free (open-source) Win, Mac, Linux Early adopters, tinkerers Medium

    Honorable Mentions

    • Shotcut: Open-source editing with steadily improving color controls.
    • Kdenlive: Linux favorite that now wins hearts on Mac and Windows.
    • Avid Media Composer | First: Free Avid workflow for broadcast-safe grades.

    How to Choose the Right Tool

    With twelve solid options, the “best” tool depends on your situation, not a review score. Here’s how I’d narrow it down.

    Budget: Spending zero? Resolve is the answer for dedicated grading. CapCut or iMovie if you want editing and grading in one fast package. VSDC if you’re locked to Windows.

    Platform: Mac users get iMovie free and Resolve runs beautifully on Apple Silicon. Windows users should look at VSDC or Resolve. Linux users—Resolve, Blender, or Kdenlive are your real options, and Resolve is the clear winner.

    Use case: Pumping out daily social clips? CapCut or Rush. Working on a short film? Resolve, no question. Running a multi-app VFX pipeline? OCIO plus Blender and Resolve. Just need a quick look? Grab a LUT pack from CGC and drop it into whatever you already use.

    Learning investment: Willing to spend a weekend learning? Resolve pays dividends for years. Need results in 30 minutes? iMovie or CapCut won’t let you down.

    Shoestring Grading Workflow: Step by Step

    Here’s the exact workflow I use on budget projects. It works in Resolve, CapCut, or any tool on this list with basic color controls.

    Step 1: Pick Your Platform

    • Platform Pick: Resolve or CapCut for most jobs; iMovie for Mac emergencies.

    Match the tool to the job. A 15-second reel doesn’t need Resolve’s node graph. A 10-minute documentary doesn’t belong in CapCut. Be honest about scope before you open anything.

    Step 2: Shoot Flat or Log

    • Shoot Flat/Log: The biggest hack for dynamic grading flexibility.

    If your camera supports it, shoot in a flat or log profile. This preserves highlight and shadow detail you can pull back in post. On iPhone, use Blackmagic Camera or Filmic Pro to unlock log recording. On dedicated cameras, enable S-Log, V-Log, or C-Log. Flat footage looks washed out on set—that’s the point. All the contrast and color come from your grade.

    Step 3: Correct First

    • First Pass: Dial exposure, contrast and white balance—trust your scopes over your eyeballs.

    Set your white balance using a neutral reference point, bring exposure into range (keep skin tones around 70 IRE on the waveform for standard dynamic range), and set contrast. In Resolve, use the primary wheels on a dedicated correction node. In CapCut, use the manual Adjust panel. Don’t touch creative color until this step is clean.

    Step 4: Apply Your Creative Look

    • Quick Looks: Lean on free LUT packs or whip up a custom preset fast.

    Now you grade. Apply a LUT at 60-80% intensity as a starting point, or build a look manually. Push color into the shadows (teal and blue are popular for a reason), warm up highlights, and adjust saturation by hue—pulling orange saturation slightly boosts skin tones without making the whole frame glow. Save this as a preset.

    Step 5: Match Your Shots

    • Shot Matching: Resolve and Cinema Grade shine when you need multi-cam consistency.

    Grab your best-graded shot as the reference. In Resolve, use Shot Match or the still store to compare. In Cinema Grade, the Match tool does this visually. The goal is consistency—viewers notice when one shot is warm and the next is cold, even if they can’t articulate why.

    Step 6: Export Smart

    • Export Check: Mind free-tier limits—Lightworks’ 720p cap taught me to always double-check.

    Check export settings against delivery specs. YouTube wants H.264 or H.265 at 1080p minimum. Instagram compresses aggressively, so export at higher bitrates than you think you need. In Resolve, aim for 20-30 Mbps for 1080p YouTube uploads.

    Step 7: Save Everything

    • Save Presets: Your future self will thank you for reusable grade settings.

    Export your LUTs, save your node trees, archive your presets. Six months from now, a client will ask for “that look from the last project” and you’ll have it ready in seconds instead of rebuilding from memory.

    Frequently Asked Questions

    Is DaVinci Resolve really free?

    Yes, genuinely free—not a trial, not a demo. Blackmagic makes money selling cameras and hardware; Resolve is the gateway. The free version includes the full Color page, Fairlight audio, Fusion compositing, and editing. Studio ($295 one-time) adds HDR tools, Neural Engine AI, and multi-GPU support. For most creators, free is more than enough.

    Can I color grade on a phone?

    Absolutely. CapCut and Premiere Rush both run on iOS and Android with functional color tools—HSL adjustments and curves that didn’t exist on mobile two years ago. The limitation is screen accuracy: phone displays are bright and oversaturated, so your grade might look different on a calibrated monitor. Grade on mobile for speed, but spot-check on a proper screen before final delivery.

    What’s the easiest color grading software for beginners?

    iMovie if you’re on Mac—it’s literally designed so you can’t mess it up. CapCut if you want more control without a learning cliff. Both get you from raw footage to graded export in under 10 minutes. Once you’re comfortable with basic adjustments, move to DaVinci Resolve. The jump feels big, but Blackmagic’s free training videos walk you through everything step by step.

    Do I need a calibrated monitor?

    For client work, yes. For YouTube and social content, probably not—but it helps more than you’d think. An uncalibrated monitor displays colors warmer or cooler than reality, so your “perfect” grade looks off to everyone else. A Datacolor SpyderX ($150) paired with a decent IPS monitor gets you 90% there. If that’s out of budget, turn off “vivid” or “gaming” display modes and view exports on multiple screens before publishing.

    Final Thoughts

    Color grading isn’t an exclusive playground anymore. Whether you’re polishing indie shorts, bootstrapped YouTube channels or viral TikToks, these tools and workflows will make your footage pop without draining your wallet. Now go get chromatic.

  • 5 Free & Low-Cost Video Editors for Beginners (2026)

    5 Free & Low-Cost Video Editors for Beginners (2026)

    5 Free & Low-Cost Video Editors for Beginners (2025)

    Introduction: Why This Guide Matters

    After countless late-night trial runs with clunky timelines and “free” apps that sneak in watermarks, I finally found a streamlined path to professional-looking videos without breaking the bank. If you’re taking your first steps as a creator, this is the guide I wish I’d had in 2025. No more download regrets or wasted exports—just five reliable editors, practical setup instructions, and real-world tips so you can publish faster and with confidence.

    What You Need Before You Start

    • Device: Windows or Mac laptop/desktop, or a reliable smartphone. Some editors also work in a browser.
    • Source Clips: A few raw footage files to practice trimming and arranging.
    • Internet Connection: Needed for downloads, updates, cloud services, and templates.
    • Optional Accessories: Headphones for audio checks and external storage for large project files.
    • Time Investment: Allocate 20–60 minutes for installing, exploring, and completing your first edit.

    Top 5 Editors at a Glance

    1. PowerDirector (Free & Paid)
      Platforms: Windows, Mac
      Highlights: Intuitive interface, AI-driven effects (auto-caption, motion tracking), no watermark in free version, huge library of transitions and templates.
      Best For: Creators who want quick, polished results without a watermark.
    2. DaVinci Resolve (Free & Paid)
      Platforms: Windows, Mac, Linux
      Highlights: Professional color grading, advanced editing tools, no watermark, extensive online tutorials.
      Best For: Beginners aiming for cinematic looks and planning to scale up to pro workflows.
    3. Clipchamp (Browser, Free & Paid)
      Platforms: Any web browser, Windows app
      Highlights: Instant browser access, social media templates, drag-and-drop simplicity.
      Best For: Chromebook users and those focused on short-form vertical videos.
    4. Wondershare Filmora (Free Trial & Paid)
      Platforms: Windows, Mac
      Highlights: Beginner automation, drag-and-drop editing, AI tools; free trial adds watermark.
      Best For: Users willing to upgrade for a seamless, user-friendly experience.
    5. CapCut (Free)
      Platforms: Windows, Mac, iOS, Android, Browser
      Highlights: Mobile-first design, trending effects, auto-captions, no watermark on export.
      Best For: Fast, on-the-go social media clips and mobile editing workflows.

    Installation & Setup

    1. PowerDirector: Visit CyberLink’s website, select Free or Paid, and run the installer.
    2. DaVinci Resolve: Download the correct OS version from Blackmagic Design and follow the prompts.
    3. Clipchamp: Go to clipchamp.com to use in-browser or install the Windows app from Microsoft Store.
    4. Filmora: Download from Wondershare; note that the free trial includes a watermark.
    5. CapCut: Install the desktop/mobile app or use the web version at capcut.com.

    Tip: If an installer hangs, reboot your device, disable antivirus temporarily, or free up disk space.

    Your First Edit: Workflow Overview

    1. Import Media: Drag clips, images, and audio into the media bin.
    2. Assemble Timeline: Place clips in sequence on the timeline.
    3. Trim & Cut: Use the razor or scissors tool to remove unwanted sections.
    4. Apply Transitions: Drag basic fades or slides between clips for smooth flow.
    5. Add Titles: Choose a text template and customize your intro/outro.
    6. Enhance with Effects: Optionally apply color correction or AI tools.
    7. Insert Audio: Add background music or a voiceover track.
    8. Export: Select MP4, set resolution (1080p recommended), and confirm no watermark warning.

    Troubleshooting Tips

    • App crashes or freezes: Close other programs, restart, lower preview resolution, update GPU drivers.
    • No audio on export: Check track mute settings and export audio options.
    • Unexpected watermark: Only Filmora’s free trial adds one. Use a different editor for watermark-free output.
    • Choppy playback: Switch preview to low quality or pre-render clips.
    • Export fails at 99%: Verify disk space, export to a new folder, or reduce bitrate.

    Pro Tip: Search “Editor Name + issue + 2025” online for community solutions in minutes.

    Efficiency Hacks & Advanced Tips

    • Learn hotkeys: “C” for cut, “Ctrl+Z” to undo, Spacebar to play/pause.
    • Use project templates for intros and outros to save setup time.
    • Batch edit and export multiple videos overnight for faster turnaround.
    • Leverage AI features like auto-captions and background removal for short-form clips.
    • Sync projects via cloud editors (Clipchamp, CapCut) to switch devices seamlessly.
    • Join creator Discords or subreddits for quick troubleshooting and inspiration.

    Platform Compatibility

    • Windows: All five editors supported.
    • Mac: PowerDirector, DaVinci Resolve, Filmora, CapCut; Clipchamp in browser.
    • Linux: Only DaVinci Resolve from this list; consider Shotcut or OpenShot as alternatives.
    • Browser: Clipchamp, CapCut.
    • Mobile (iOS/Android): CapCut (Filmora app also available but less beginner-friendly).

    Honorable Mentions

    • Shotcut: Free, open-source, no watermark; steeper learning curve.
    • OpenShot: Simple and free, but stability can vary.
    • iMovie: Excellent for Apple users seeking basic edits; limited for advanced effects.
    • Lightworks: Robust free tier but locks key export features behind a paywall.