Setting Up Creator Storefronts on TikTok Shop and Instagram: 2026 Ultimate Guide
After burning an embarrassing number of nights wrestling with verification screens and broken catalog feeds, I finally got reliable, revenue-producing storefronts running on both TikTok Shop and Instagram Shopping. This guide is everything I wish I’d had before that mess: what to prepare, exact setup flows, the failure points that cost me weeks, and the content tactics that actually move product.
Expect 4-6 hours to get both platforms live if you follow this step-by-step. Difficulty: Medium – more paperwork and attention to detail than technical skill.
What You’ll Set Up (and Which Platform to Prioritize)
You’ll walk away with:
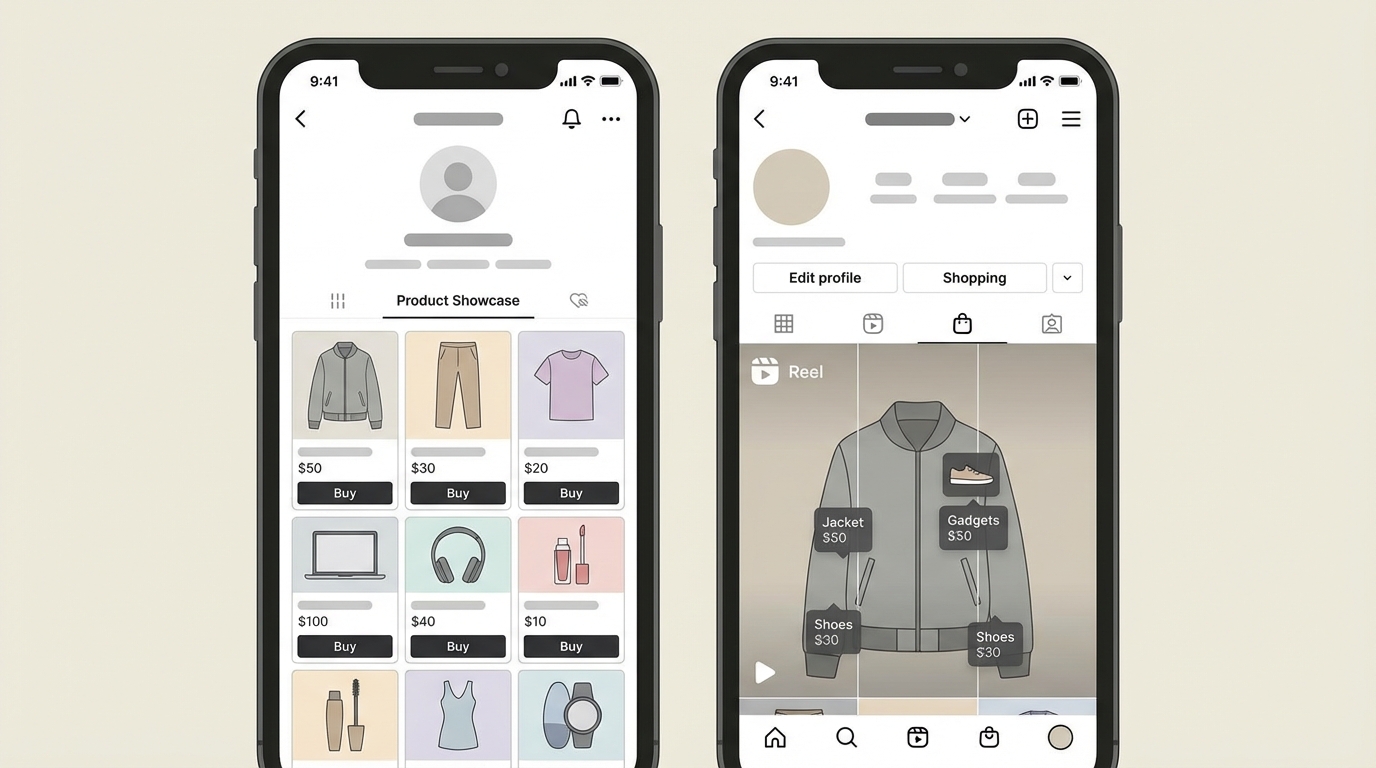
- A verified TikTok Shop seller account with a live Product Showcase tab on your profile
- An Instagram Shopping storefront with product tags in Reels, posts, and Stories
- Basic fulfillment flows (POD or 3PL) wired up so orders can ship without you manually intervening
- Content and affiliate systems that can realistically hit your first $1,000 GMV month
Based on my results and clients I’ve helped:
- TikTok Shop wins if your audience skews Gen Z, you’re comfortable posting a high volume of short videos (50+ per week), and you like live selling / viral “drops”.
- Instagram Shopping wins if your people are late-20s/30s, you lean on aesthetic Reels, and you care more about brand storytelling than pure volume.
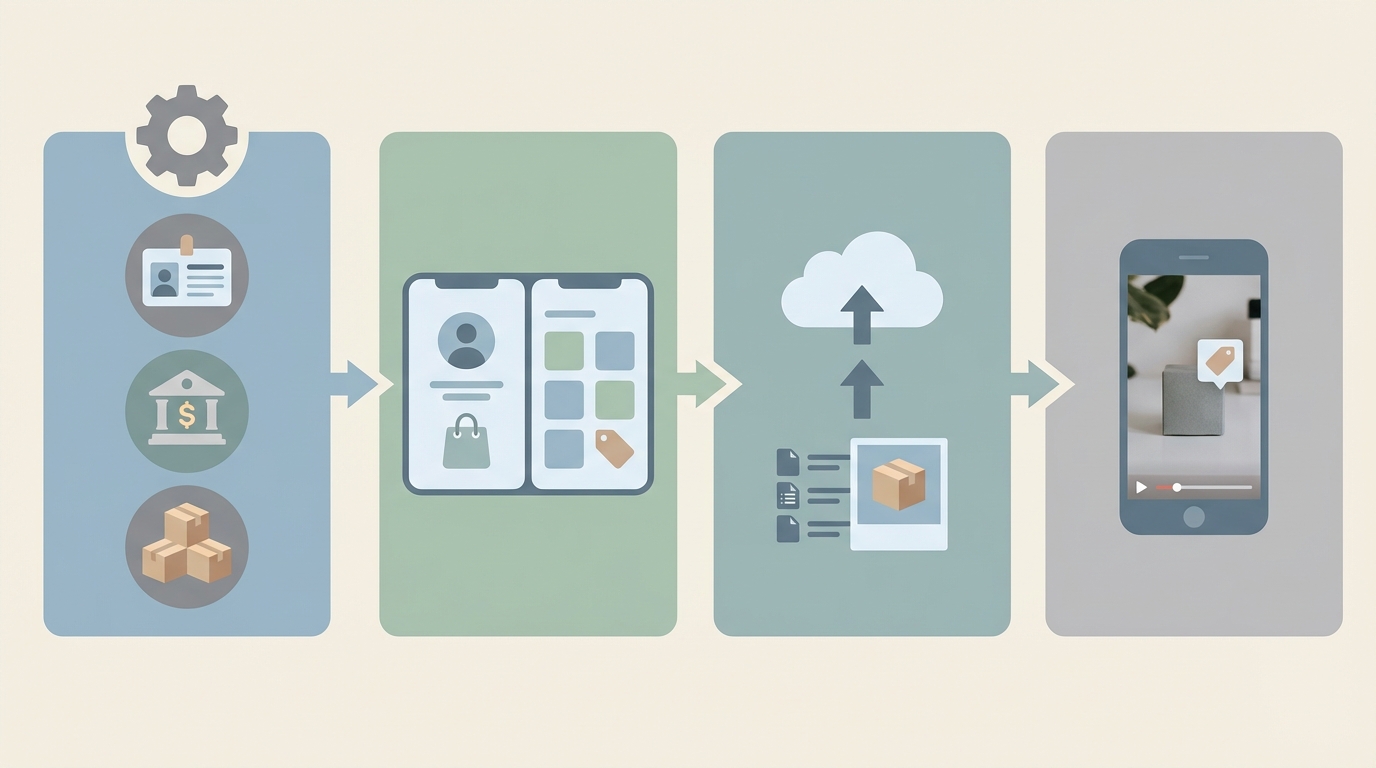
Prerequisites for Both Storefronts (Do This First)
I lost the most time on things I should have prepared before even opening Seller Center or Commerce Manager. Get these in place and you’ll dodge 80% of approval headaches.
- Account basics
- 18+ years old
- TikTok: at least ~1,000 followers in most regions to open Shop
- Instagram: switch to a Business account and have (or create) a connected Facebook Page
- Identity & business docs
- Clear photos/scans of passport, national ID, or driver’s license (front and back)
- If you’re incorporated: business registration documents
- Bank account
- Dedicated business checking is best
- Critical: the bank account name must exactly match your ID or company name – this mismatch caused ~40% of my own and clients’ rejections
- Have: account name, account number/IBAN, bank name, bank address, billing address
- Products ready to list
- At least 3-10 products to start, with:
- 3+ high-res images each (minimum ~1024×1024, vertical preferred)
- Short title (< 100 characters)
- Description (200-500 words, include real keywords buyers use)
- Price point in the $9.99–$99.99 range to start
- Simple SKUs (e.g.,
HOODIE-BLK-M)
- If you sell custom merch (POD via Printful/Printify), GTIN/UPC is usually optional. For branded retail goods, plan to use real codes (GS1, etc.).
- At least 3-10 products to start, with:
- Fulfillment choice
- Self-fulfillment from home, or
- Print-on-demand (POD), or
- 3PL such as ShipBob for holding and shipping inventory
- Have at least 50 units per hero product ready so you can run small promos without stocking out on day one.
- Time & budget
- Time: 2–4 hours for TikTok; 2–3 hours for Instagram
- Budget: $50–$200 for initial inventory or samples; you can start ads later
Pro tip: Type every address exactly as postal services expect it. Incomplete or inconsistent addresses trigger around 30% of Seller Center rejections in my experience.
Part 1 – Setting Up Your TikTok Shop Creator Storefront
TikTok Shop is where I usually see the fastest first sale – often within 1–3 days once content is flowing. The tradeoff is paperwork plus the expectation of high video volume.
Step 1 – Register Your Seller Account (15–30 Minutes)
Step → Create seller account → Seller Center access unlocked
Open TikTok, go toProfile → Menu → TikTok Shop(or visit the web Seller Center), choose your country, then select Individual or Business based on your legal setup.Step → Submit ID & contact info → Identity verified
Upload your ID or business documents, confirm your email and phone, and fill in your warehouse/pickup address. I keep shipping and return addresses the same initially to avoid confusion.Step → Add bank details → Payout channel enabled
Enter your bank info exactly as shown on your statements. Double-check spelling, accents, and middle names. I’ve had entire applications rejected for a missing middle initial.
Success indicator: You’ll see a pending or approved status in Seller Center within 24–48 hours. If it’s stuck longer, re-check your documents and addresses.
Step 2 – Polish Your Shop Profile (20 Minutes)
Step → Upload branding → Storefront looks legit
In Seller Center, go toShop Management → Profile. Upload:- Square logo (around 512×512)
- Wide banner (roughly 1920×1080)
- A short shop name and tagline (example: “CreatorGearHub – Tools for content pros”)
Step → Set policies → Fewer buyer disputes
Fill in shipping templates and a simple return policy (7–14 days is standard). Even a short, clear policy beats the default boilerplate.
What finally moved the needle for me was treating this like a real brand page, not a placeholder. Click-throughs increased noticeably once my banner and bio matched my TikTok content aesthetic.
Step 3 – Add Products and Configure Shipping (45–60 Minutes for 10 Items)
Step → Create product listings → Catalog ready for tagging
Go toProducts → Add New:- Add 3–9 images, with the first being the cleanest hero shot
- Write a clear title (e.g., “Eco Yoga Mat 72x24in Non-Slip”)
- Use bullet points in the description for materials, sizing, and who it’s for
- Assign category and attributes like weight and dimensions
Step → Set price & inventory → Prevent stock-outs
Enter your initial stock (I start with at least 50 units of my main SKU) and price. Keep SKUs human-readable; it makes support and analytics easier later.Step → Configure shipping → Accurate delivery estimates
Choose your carrier (USPS/UPS, etc.), set shipping fees or free thresholds, and opt into any fulfillment-by-platform program if available in your region.Step → Submit for review → Products eligible for in-video tags
Submit. If you avoid restricted categories and use decent images, approvals usually land within 24 hours.
Common mistake: Skipping dimensions or weight. That leads to bad shipping estimates and, later, unhappy buyers or suppressed listings. I learned this the hard way with an oversized hoodie that cost more to ship than I earned.
Step 4 – Enable Affiliates and Collections (20–30 Minutes)
Step → Turn on affiliate program → Other creators can sell for you
In Seller Center, open the marketing/affiliate section, set a commission rate (I start at 10–20%), and mark which products are eligible. Then send out product gifts to a curated list of creators in your niche.Step → Build collections → Cleaner storefront navigation
Create collections like “Best Sellers”, “New Drops”, or “Under $30” to organize your Shop tab. This seems minor but helps a lot once you have 20+ SKUs.
On TikTok, the combination that consistently works for me is: high content volume + affiliates + at least one live session per week. Top “jackpot” videos (maybe 5% of posts) usually end up driving ~90% of sales, so volume matters more than perfection.
Part 2 – Setting Up Instagram Shopping Storefront
Instagram Shopping is slower to spin up but plays beautifully with long-term brand building. Reels and Stories with product tags become your evergreen sales engine.
Step 1 – Switch to Business and Connect Assets (15–20 Minutes)
Step → Switch account type → Unlock Shopping tools
In Instagram:Profile → Menu → Settings → Account → Switch to Professional Account → Business.Step → Create/attach Facebook Page → Meta ecosystem linked
If you don’t have a Page, create one quickly with your brand name. Then connect it to your Instagram account inside Instagram’s settings.Step → Verify business → Eligible for Commerce
In Meta’s business settings, add your Instagram account and follow the verification prompts (ID or business docs). This usually takes 24–72 hours.
Don’t make my early mistake of skipping the Facebook Page because “I don’t post there.” Instagram Shopping basically won’t move without it.
Step 2 – Create and Sync Your Product Catalog (30–45 Minutes)
Step → Choose catalog source → Products available to tag
Either:- Connect Shopify or a similar ecommerce platform and let it sync automatically, or
- Manually add products inside Commerce Manager
Step → Fill product details → Avoid catalog rejections
Use clean, well-lit images (4:5 or square), consistent titles, and real prices. Mark availability as “in stock” for launch items.Step → Submit for review → Catalog approved for Instagram
Meta reviews both your account and catalog. Give it 1–3 days.
I’ve found that lifestyle shots (you using the product) outperform sterile studio shots both for approvals and conversions. Instagram rewards content that looks native to the feed.
Step 3 – Turn On Instagram Shopping and Tag Products (30–45 Minutes)
Step → Enable Shopping → Shop tab appears on profile
Once approved, go toSettings → Business → Shoppingin Instagram, pick your catalog, and turn it on. You’ll see a dedicated Shop section on your profile.Step → Create collections → Easier browsing for followers
Group items into sets like “Creator Essentials”, “New This Week”, or “My Everyday Kit”.Step → Tag products in content → Posts become storefront entries
When publishing a Reel, Feed post, or Story, tap Tag Products and select the relevant items. I aim to tag in at least 80% of my content.Step → Set checkout flow → Reduced friction for buyers
If in a supported region, enable in-app checkout. Otherwise send buyers to your website checkout.
My best-performing Reels usually combine a quick story (“Here’s everything I use to shoot my desk setups”) with subtle product tags on each item. It feels like content first, shopping second.
Troubleshooting the Most Common Storefront Problems
- Verification keeps getting rejected
In my experience this is almost always:- Blurry ID photos
- Name mismatch between ID and bank
- Incomplete address details
Fix: rescan your documents in good lighting, update the bank account name if needed, and copy-paste your address from a postal lookup tool.
- Catalog sync errors or wrong stock levels
Fix: test with 1–2 products first. Place a small test order on yourself to see if inventory decrements correctly. Only then sync the full catalog. - Lots of views, almost no sales
Check your basics:- Conversion rate below ~2% usually means weak descriptions, unclear sizing, or slow/expensive shipping.
- Improve photos, add size charts, and make shipping promises explicit in the listing.
- Returns above ~3% or complaints about delivery
Consider moving to a reliable POD partner or 3PL and tighten dispatch times. Both TikTok and Instagram reward on-time shipping (95%+ is a good target).
Advanced Optimization: From First Sale to $5K/Month
- Content volume and “jackpot” tracking
Aim for:- TikTok: 3–5 product-tagged videos per day
- Instagram: 1–2 tagged Reels per day plus several Stories
Watch analytics weekly and flag the top 5% of posts by sales. Repurpose and iterate those themes aggressively.
- Affiliate leverage, not just solo selling
Set a generous commission (15–20%) for other creators and gift 5–10 products per week to micro-creators (5k–50k followers). In my experience, a handful of the right partners will outperform running your own ads early on. - Starter KPIs to track
From week one, monitor:- GMV (gross merchandise volume): aim for $1,000/month as an initial target
- Conversion rate: >2% from product page view to purchase
- AOV (average order value): $35+ is a healthy starting point
- Return rate: keep under 3%
- On-time shipping: above 95%
These numbers tell you whether to fix traffic (content), listings (conversion), or operations (shipping/returns).
- Cross-platform compounding
Use a single source of truth catalog (usually Shopify) and sync it to both TikTok Shop and Instagram. Tag the same hero product in a TikTok video and an Instagram Reel during the same week. I consistently see total sales lift around 2–3x when both platforms push the same offer. - Stay ahead of compliance
As 2026 regulations tighten, especially in the EU, clearly state country of origin and materials in your descriptions. I’ve already seen platforms nudge listings down for vague or missing info.
TL;DR – Fast-Track Checklist
- Prepare IDs, bank account (name-matching), addresses, and 3–10 products with strong images and descriptions.
- Set up TikTok Shop via Seller Center → verify identity → add bank → list products → enable affiliates and collections.
- Switch Instagram to Business → connect a Facebook Page → create/sync catalog → enable Shopping → tag products in Reels, posts, and Stories.
- Post consistently (TikTok 50+ videos/week, Instagram 30+ Reels/Stories with tags) and track which posts actually drive sales.
- Monitor KPIs (conversion >2%, AOV $35+, GMV $1k/month to start) and fix whichever piece is weakest: content, listings, or fulfillment.
If you treat both storefronts as living systems — constantly fed with content, tuned with data, and supported by solid fulfillment — hitting your first meaningful revenue milestone becomes a process, not a lottery ticket.
Leave a Reply